Patterns
Write a pattern row by row
Stitch rows, repeats, section headers, row spans, and notes: the whole pattern editor.
Step 1: Open the instructions
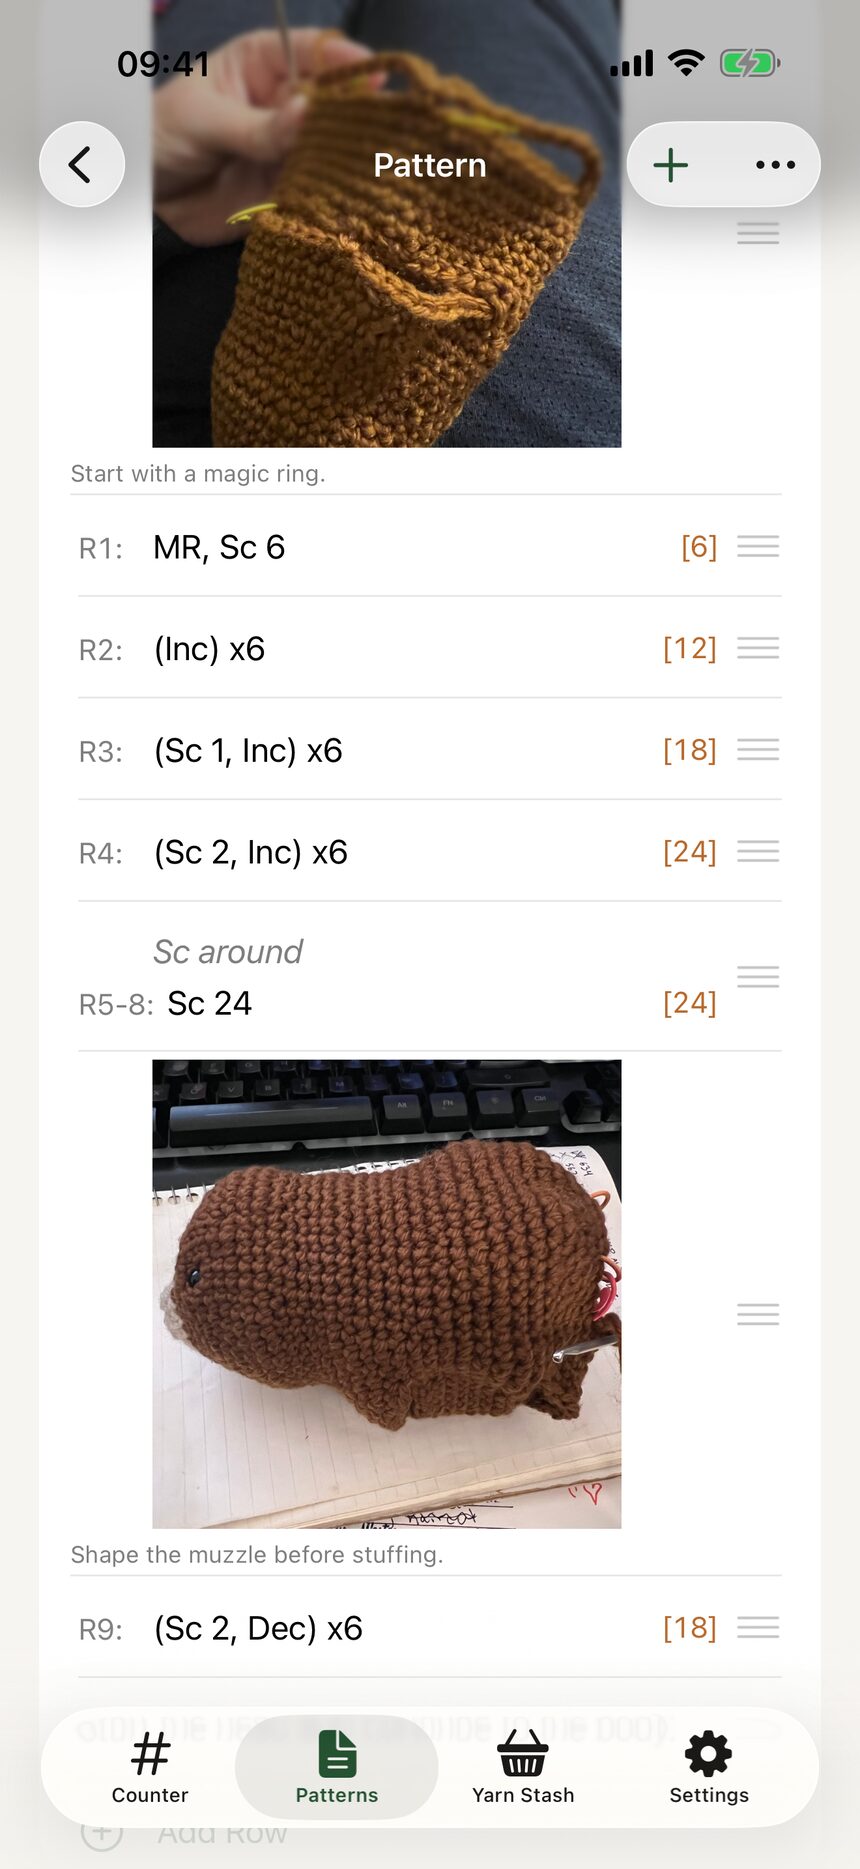
Open any pattern and you are looking at its instructions. Rows appear in order, exactly as you will work them.
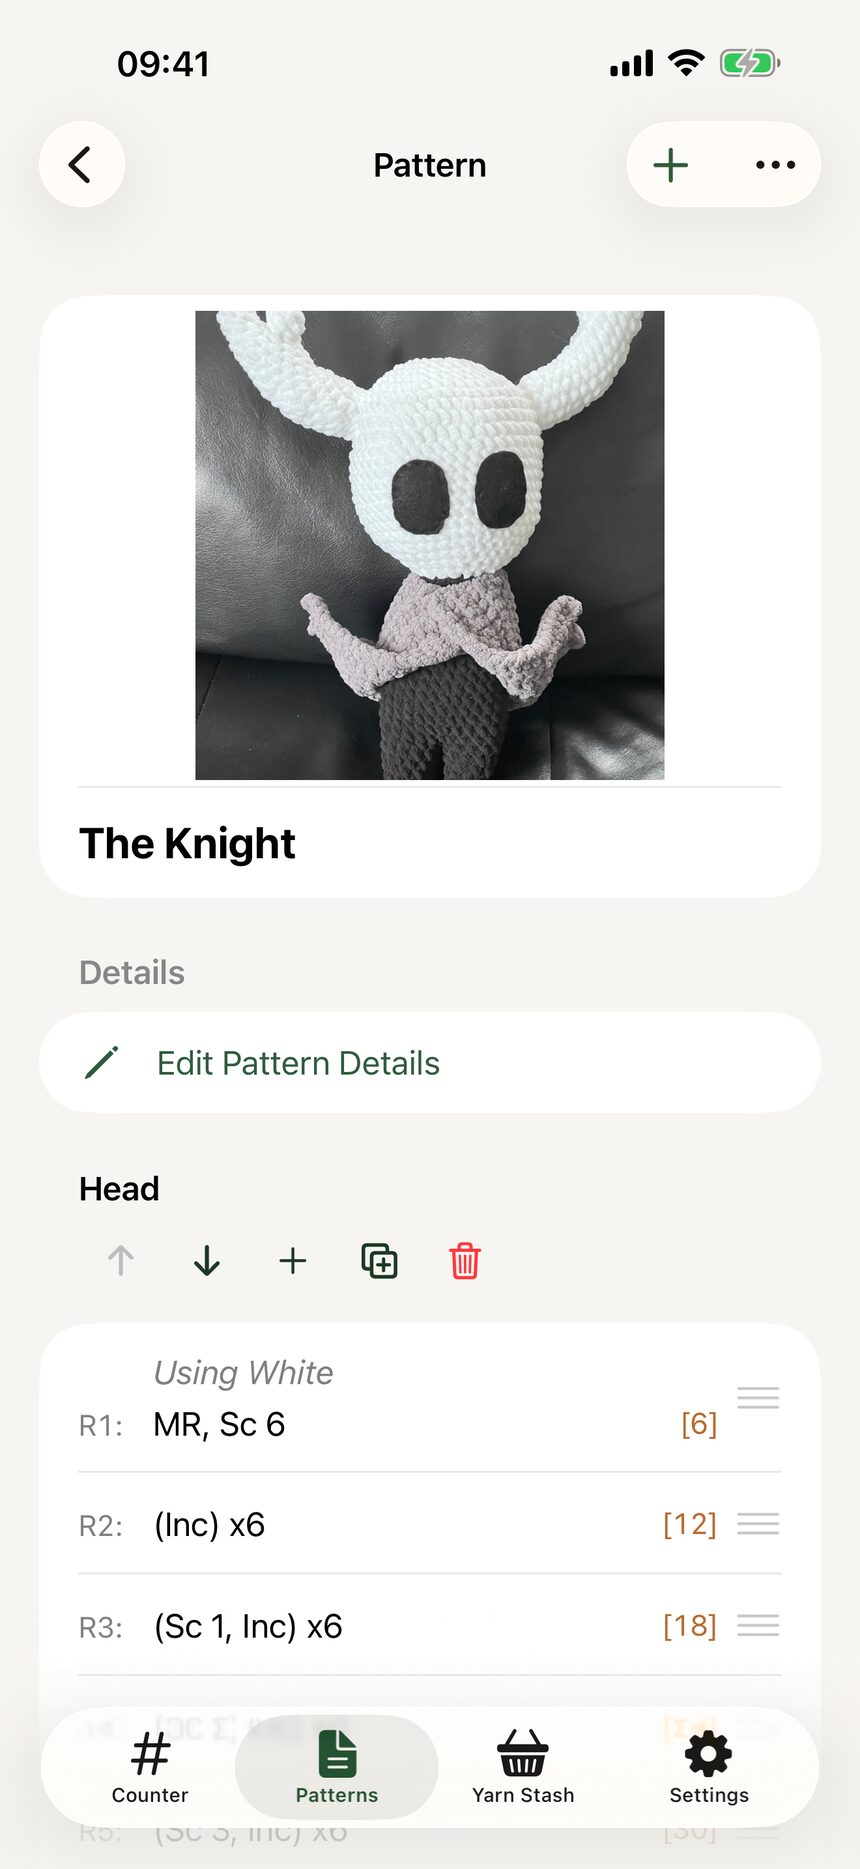
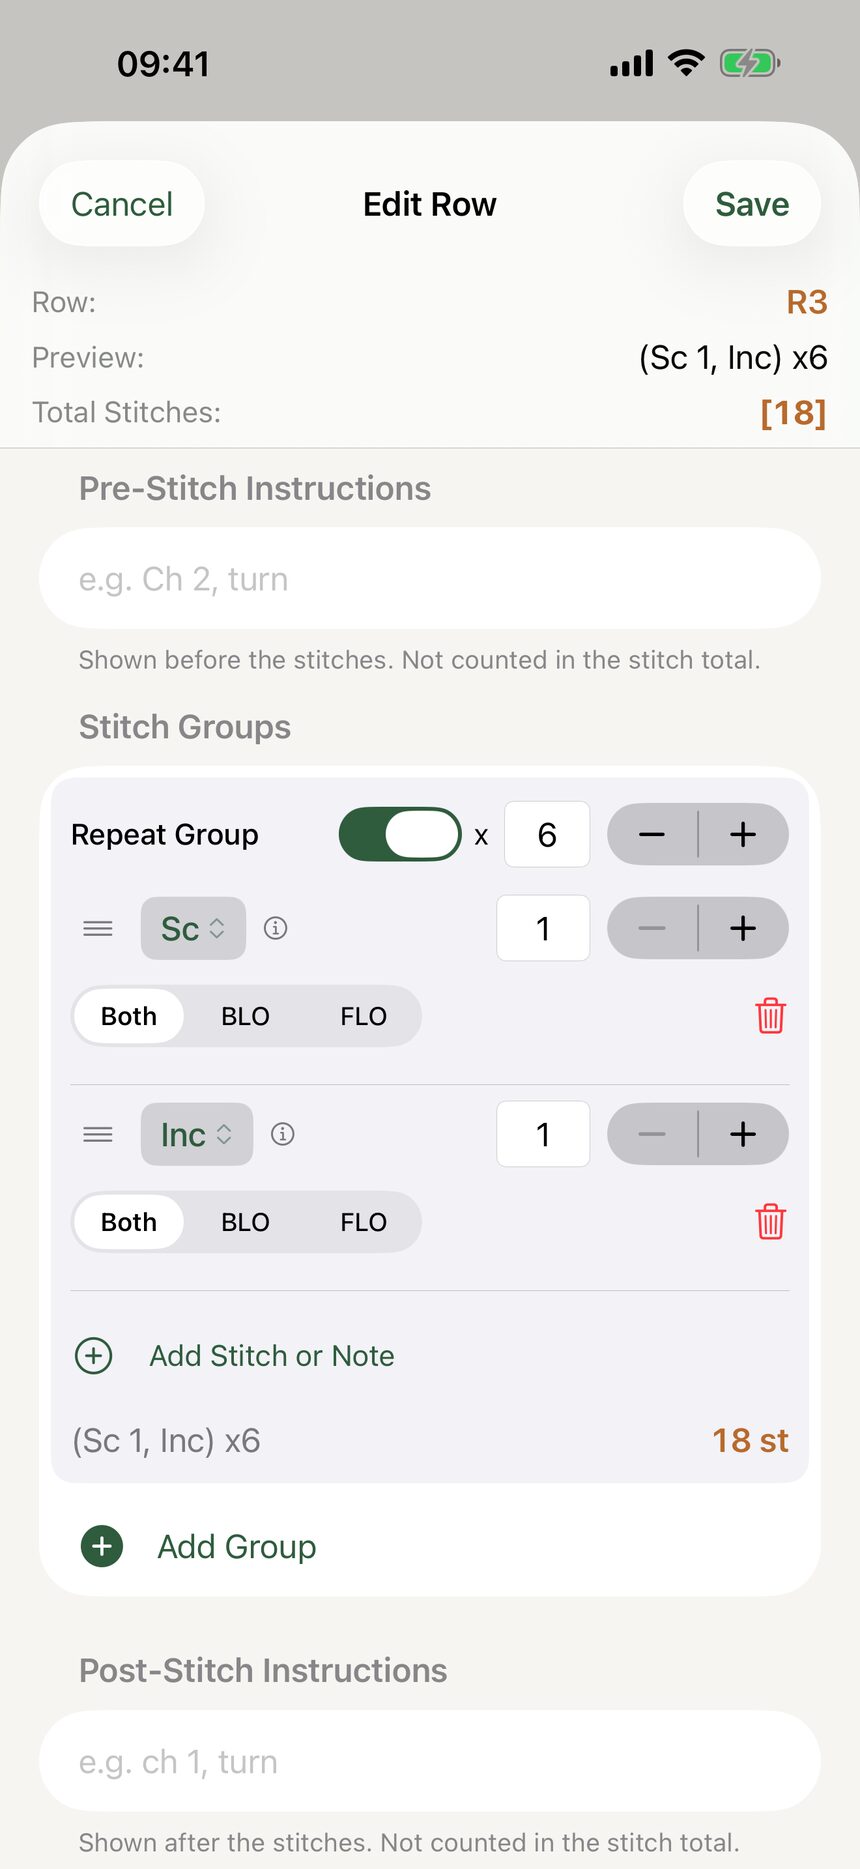
Step 2: Add a stitch row
Tap to add a row, then pick stitches and counts in the row editor. Something like (sc, inc) x 6 takes just a few taps. You pick stitches from a list rather than typing abbreviations, so typos never sneak into a pattern.

Step 3: Group stitches with repeats
Wrap stitches in a repeat and tell HookPlan how many times to work it. The editor shows the bracket and the total stitch count for the row, so you always know the math checks out.
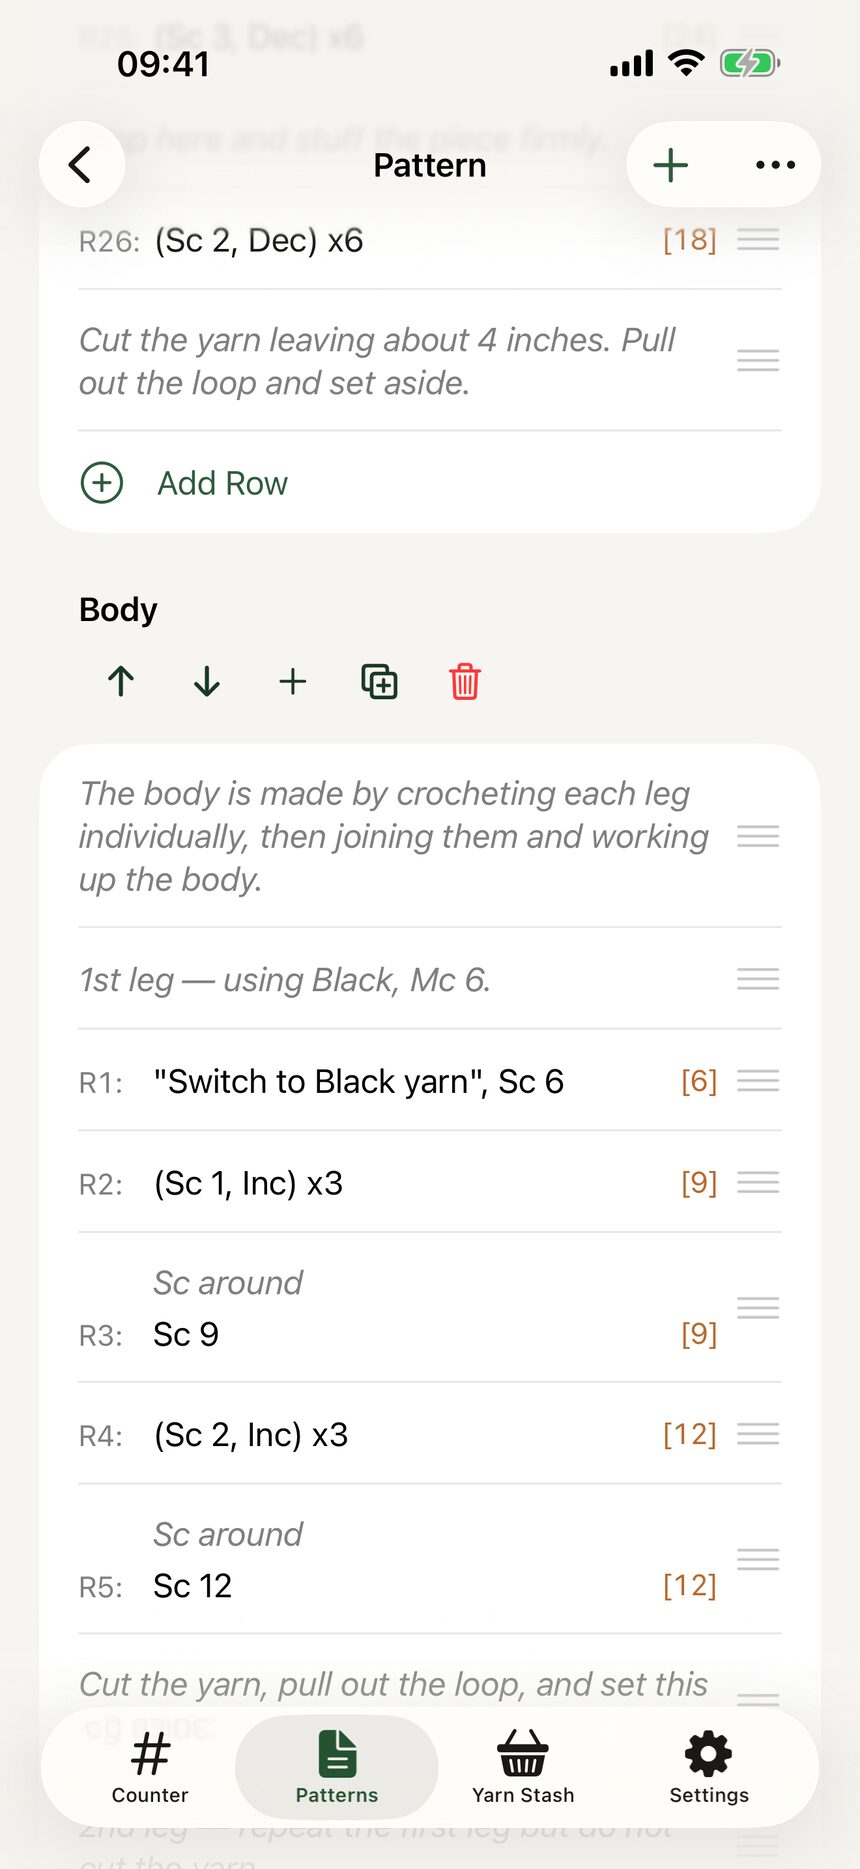
Step 4: Break big patterns into sections
Add section headers like Body, Arms, and Head to split a long pattern into chapters. Sections keep an amigurumi pattern from feeling like one endless list.
Step 5: Write multi-row spans once
If rows 7 through 14 are all the same, write R7-14 one time. When you start a project from the pattern, HookPlan expands the span into individual rows you can check off one by one.
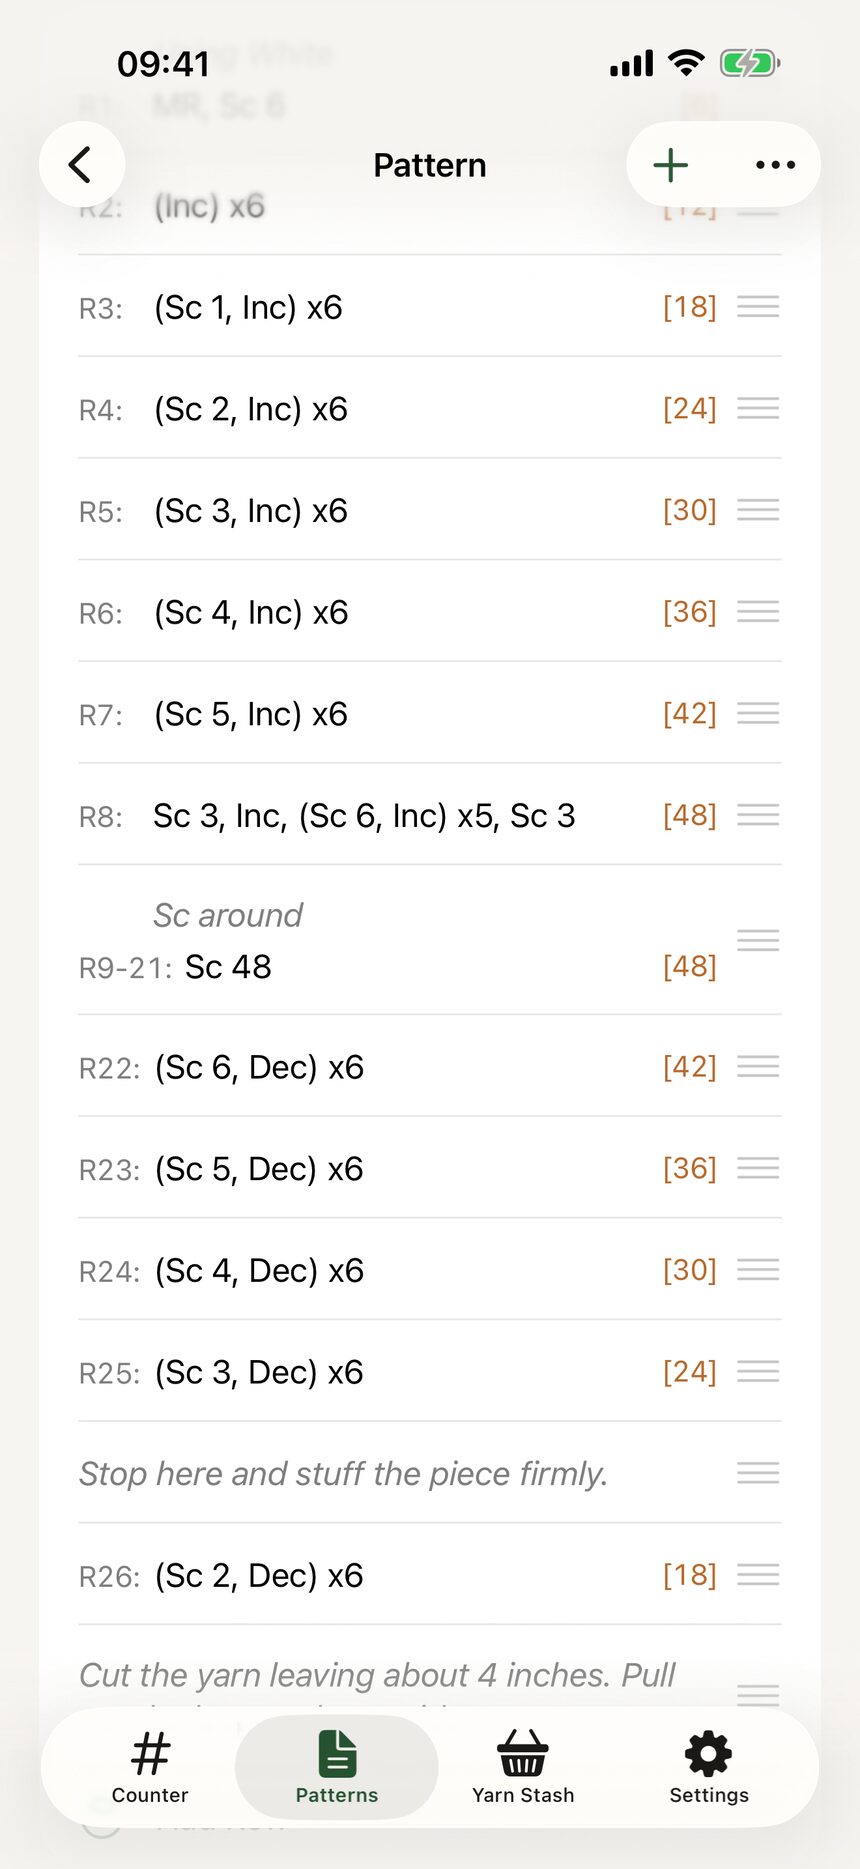
Step 6: Add notes and images between rows
Text rows hold reminders like Insert safety eyes now, and image rows hold diagrams or inspiration photos. Place them anywhere between stitch rows or sections.
More about patterns
- Create your first patternFrom an empty library to a named pattern in three taps.
- Record materials and detailsHooks, yarn, dimensions, and credit where credit is due.
- Switch between US and UK termsOne toggle converts a whole pattern between US and UK stitch names.
- Organize your pattern libraryGrid or list, tags, search, and an archive for finished favorites.
Still have a question?
The FAQ covers the common ones, and the contact form reaches a real person. Either way, you will not be left guessing.
Visit support